Service provision, especially motor vehicle repair, is a major part of the industry. Businesses that provide these services often have to record daily transactions of the items bought and repairs performed in the auto shop. Preparing an auto repair invoice is the easiest way to record these transactions. It is a document that contains information on repair works done on a client’s vehicle and the agreed-upon cost for each service.
This invoice is a useful record-keeping tool for the shop owner and client. It provides a record of repair information, the charges for labor, and the price of each item used. With a good invoice, the shop owner can record specific work details.
Further, if the work done is extensive, the shop owner can provide a breakdown of each task, making it easier for their client to understand how their total was calculated. Good invoices also make conducting bookkeeping services easier and running the business efficiently.
This article guides you on what you need to know about these invoices. It discusses the significance of using a template for such purposes and how to make your auto-repair invoice using MS Word and Excel.
Auto Repair Invoice Templates
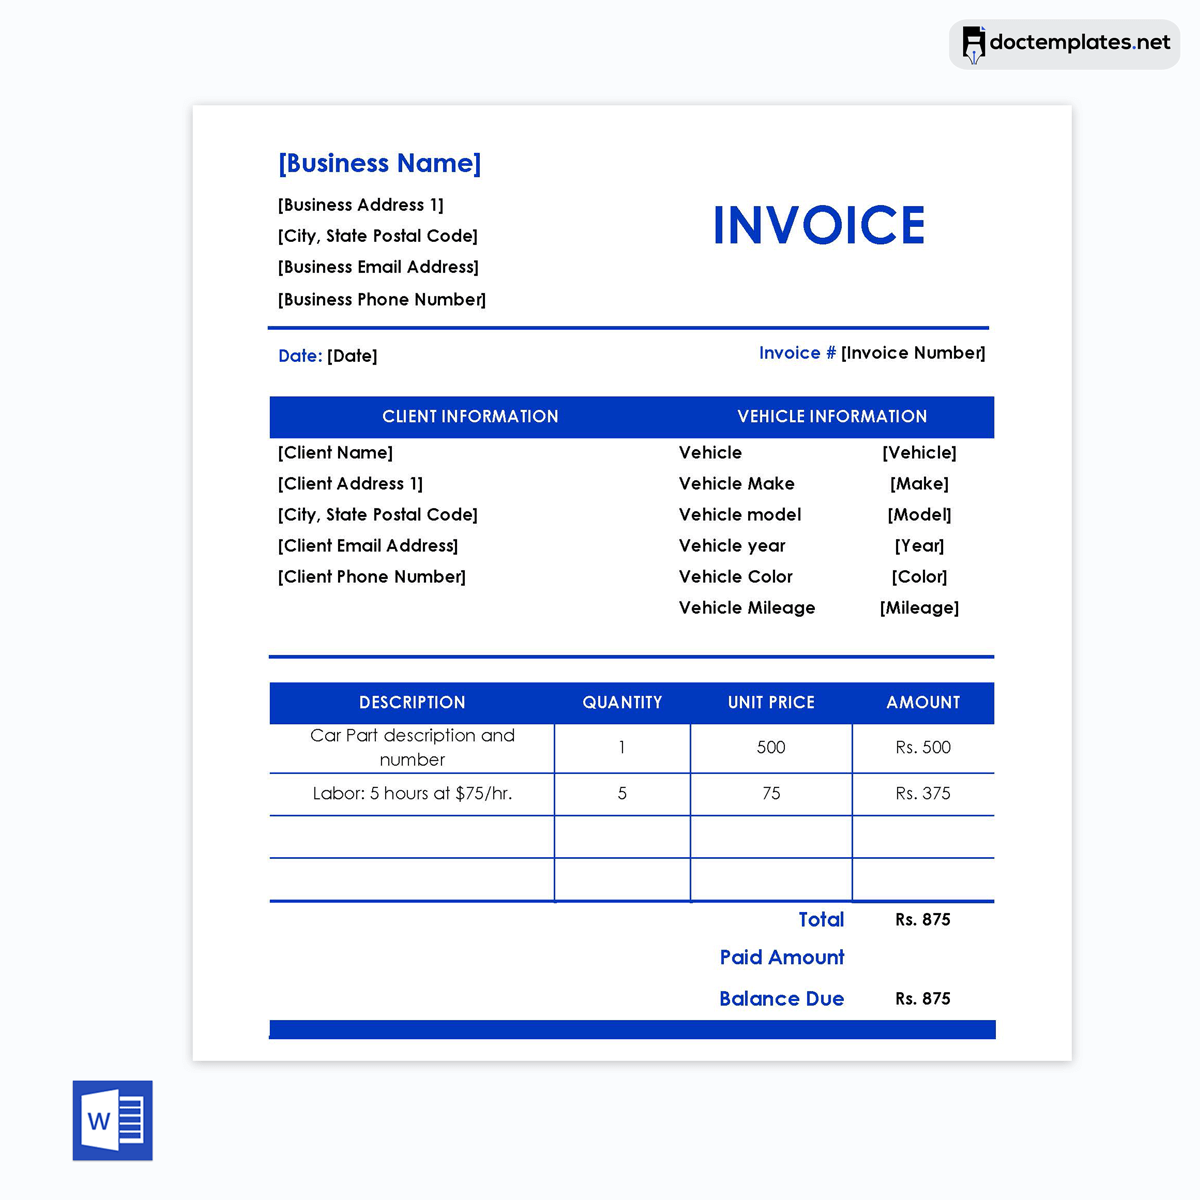
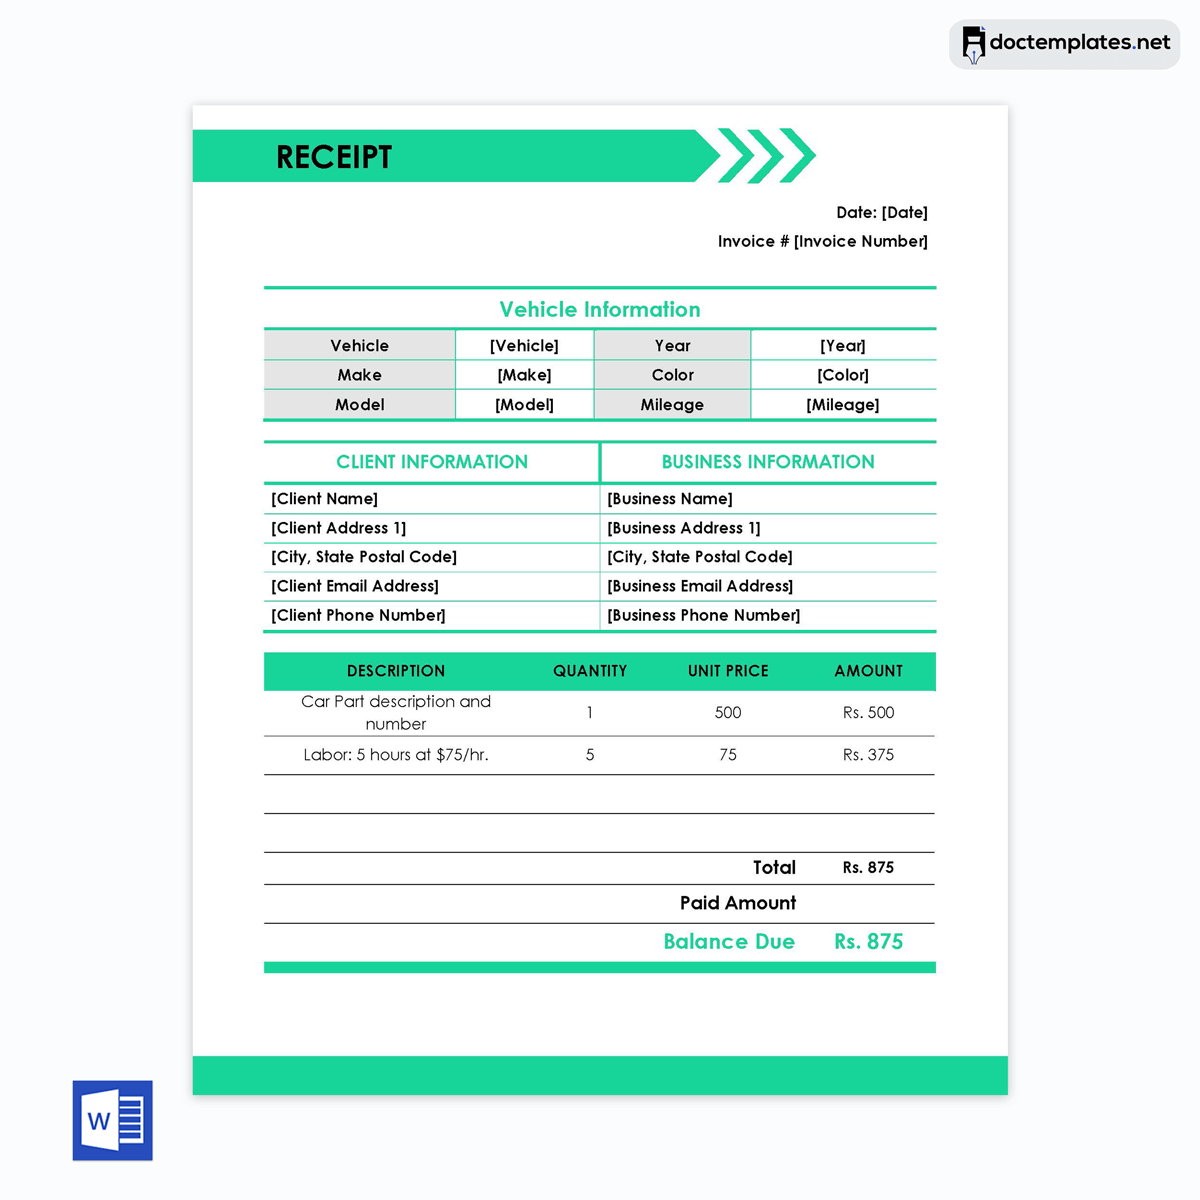
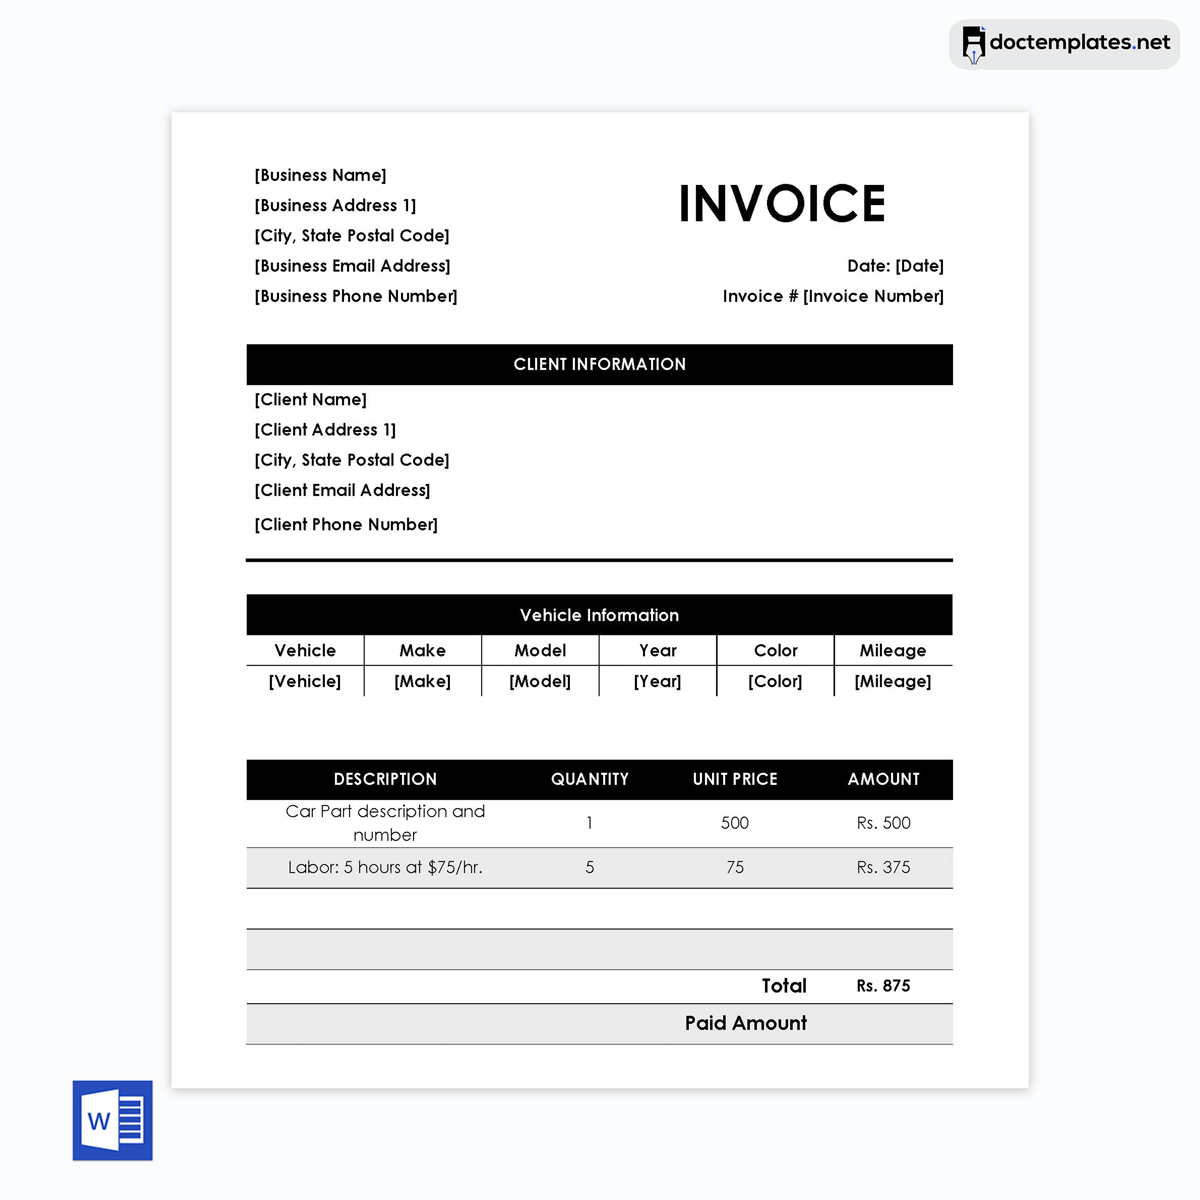
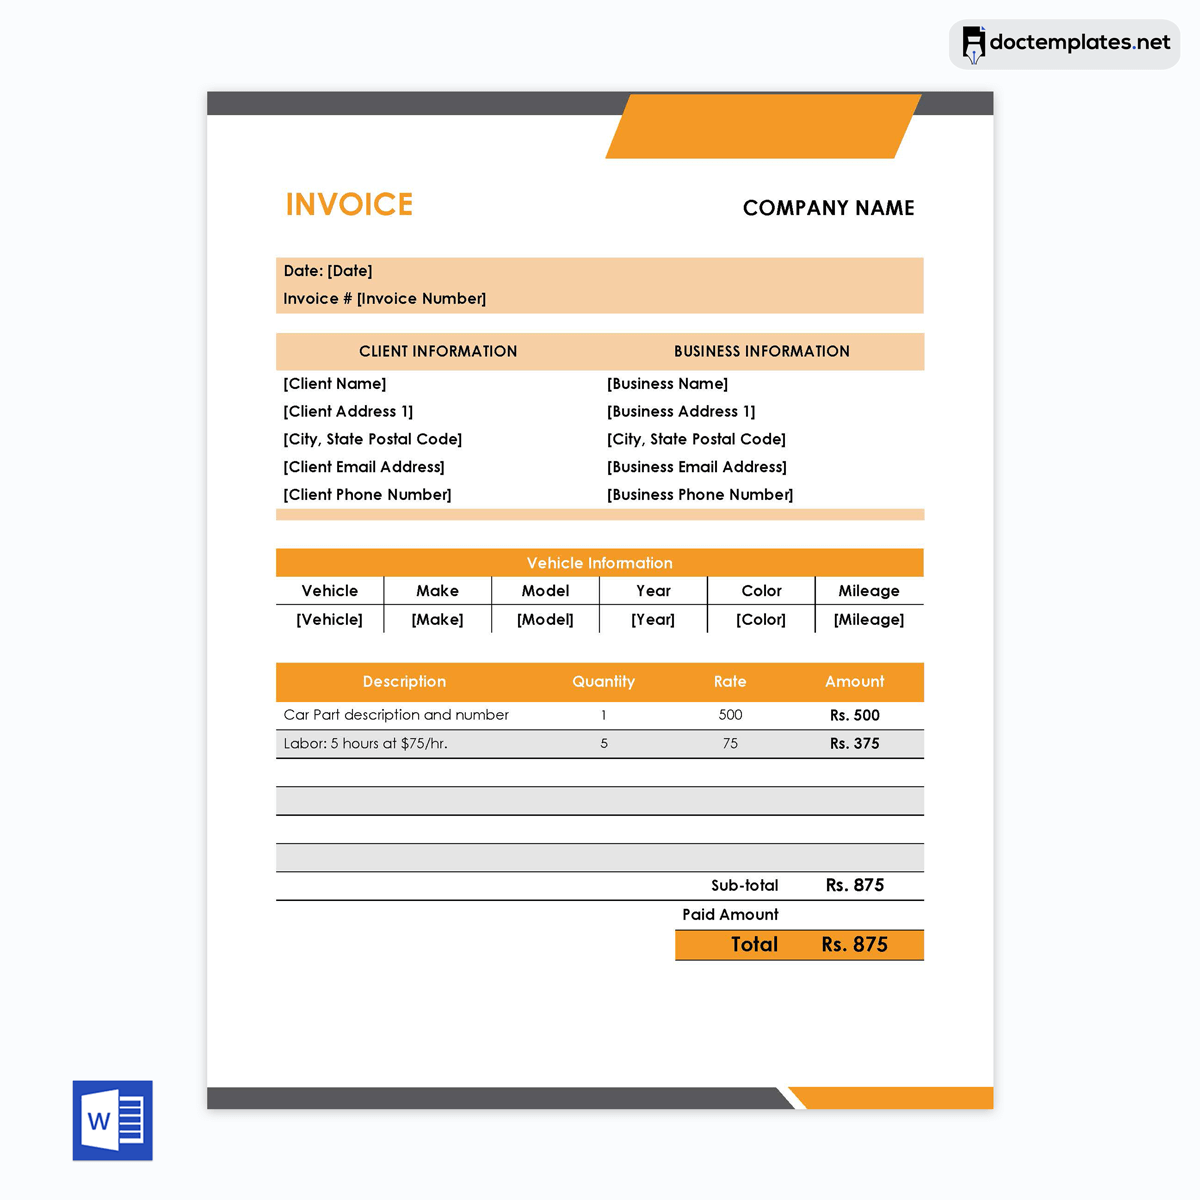
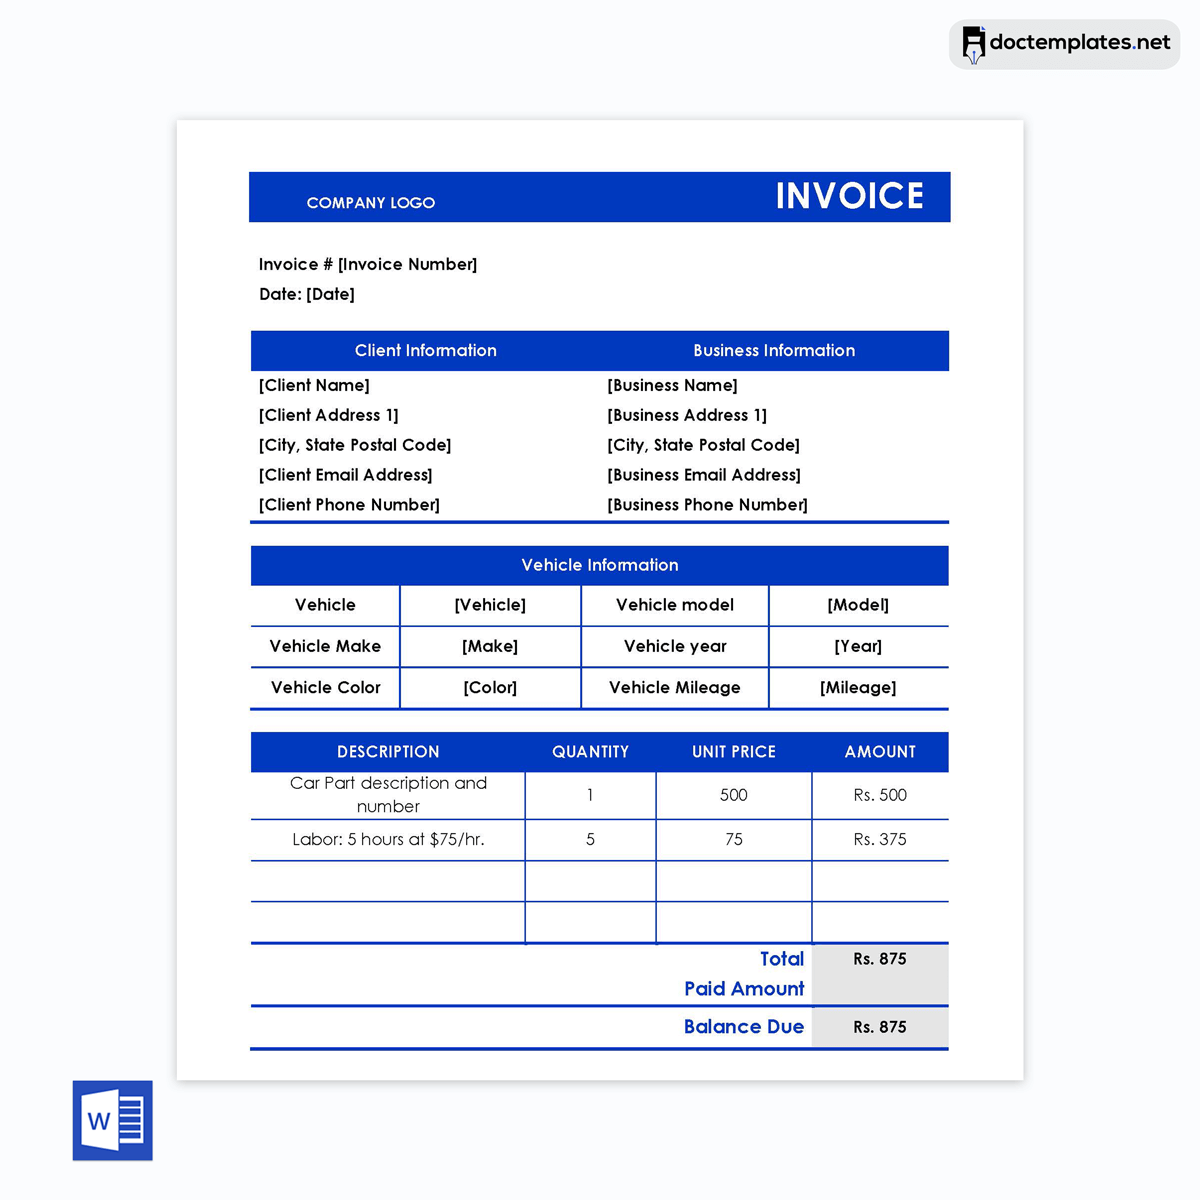
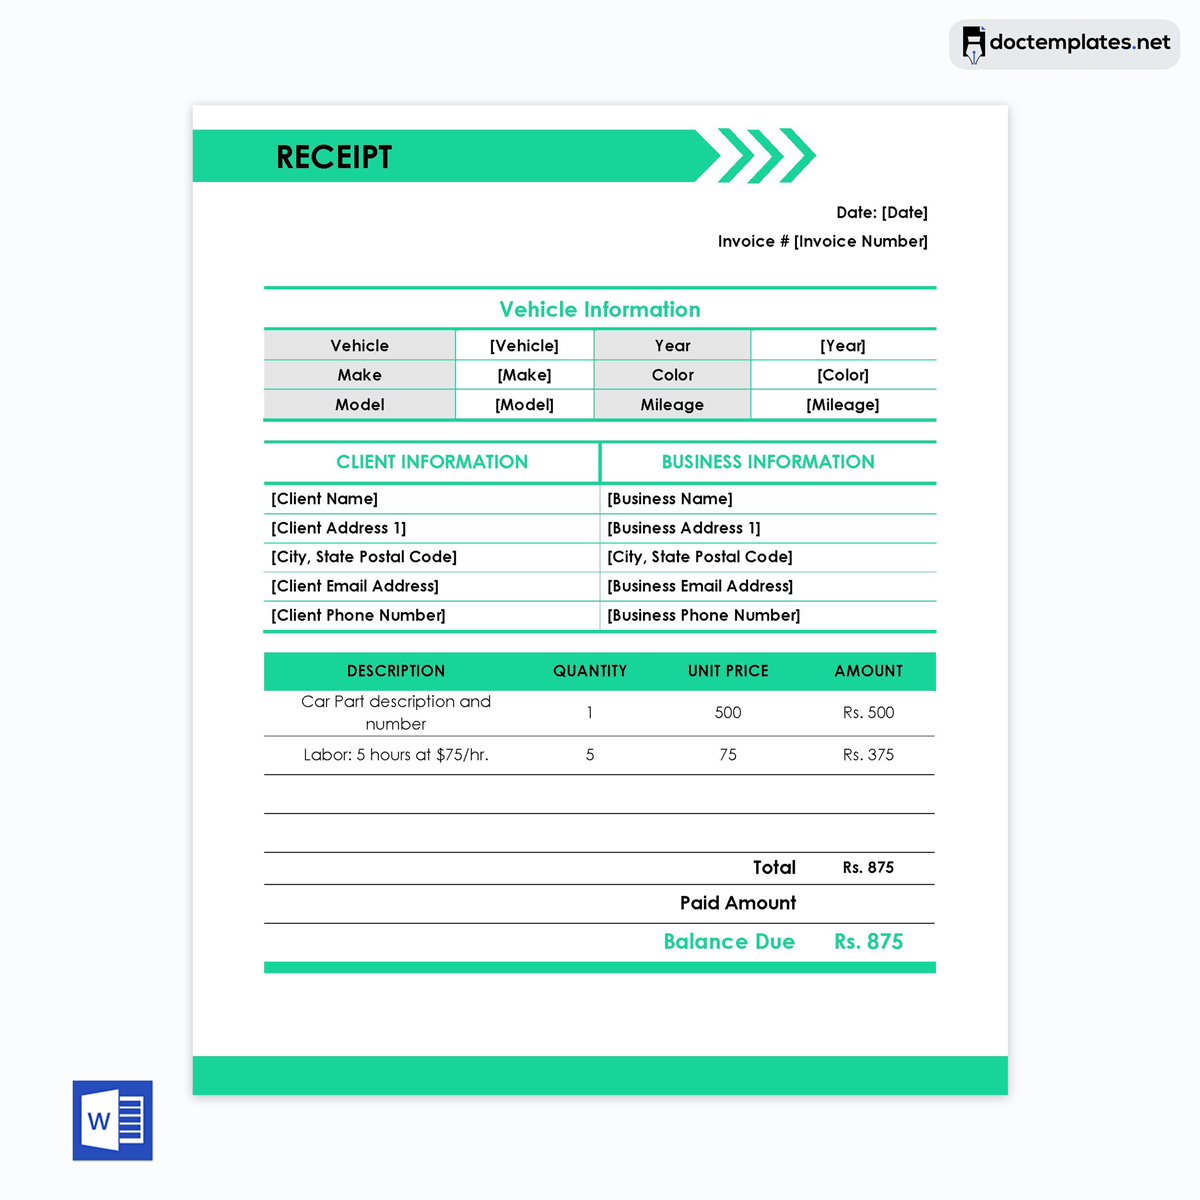
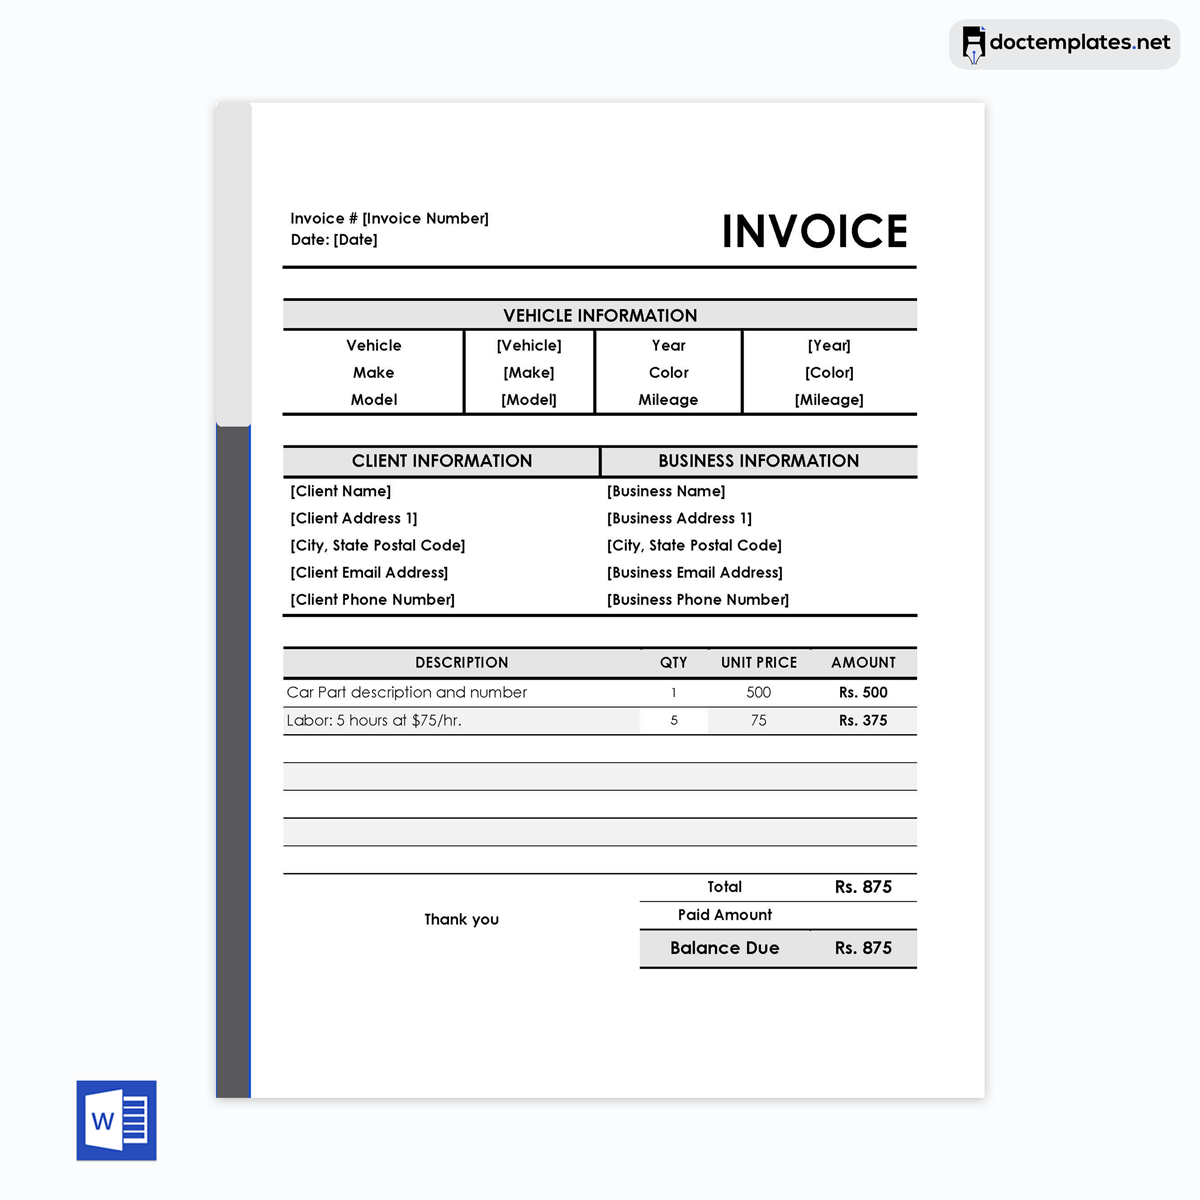
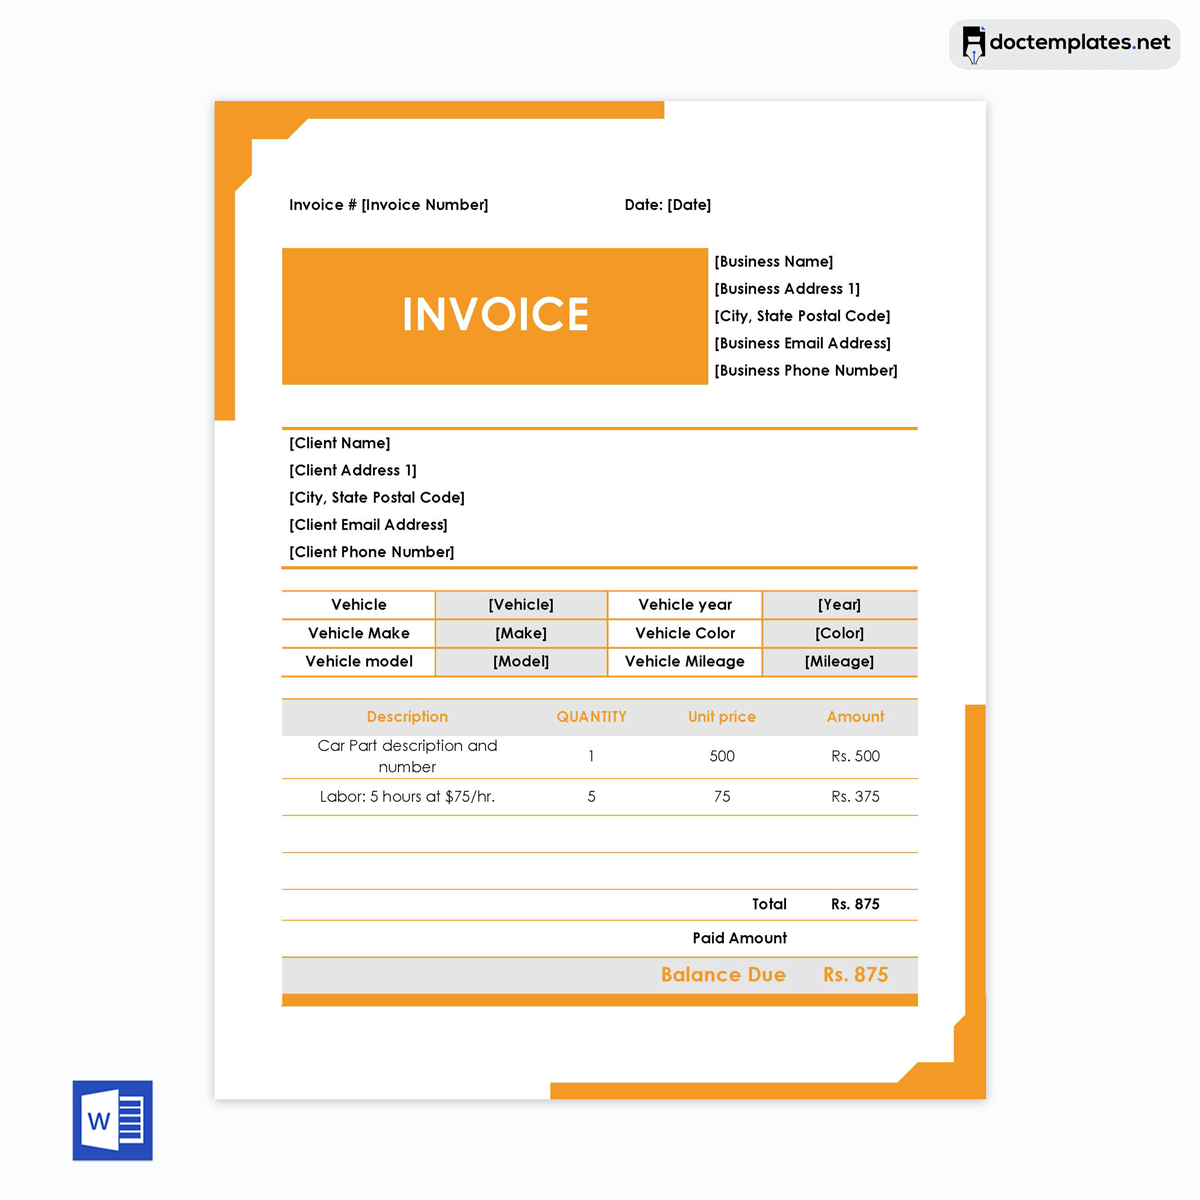
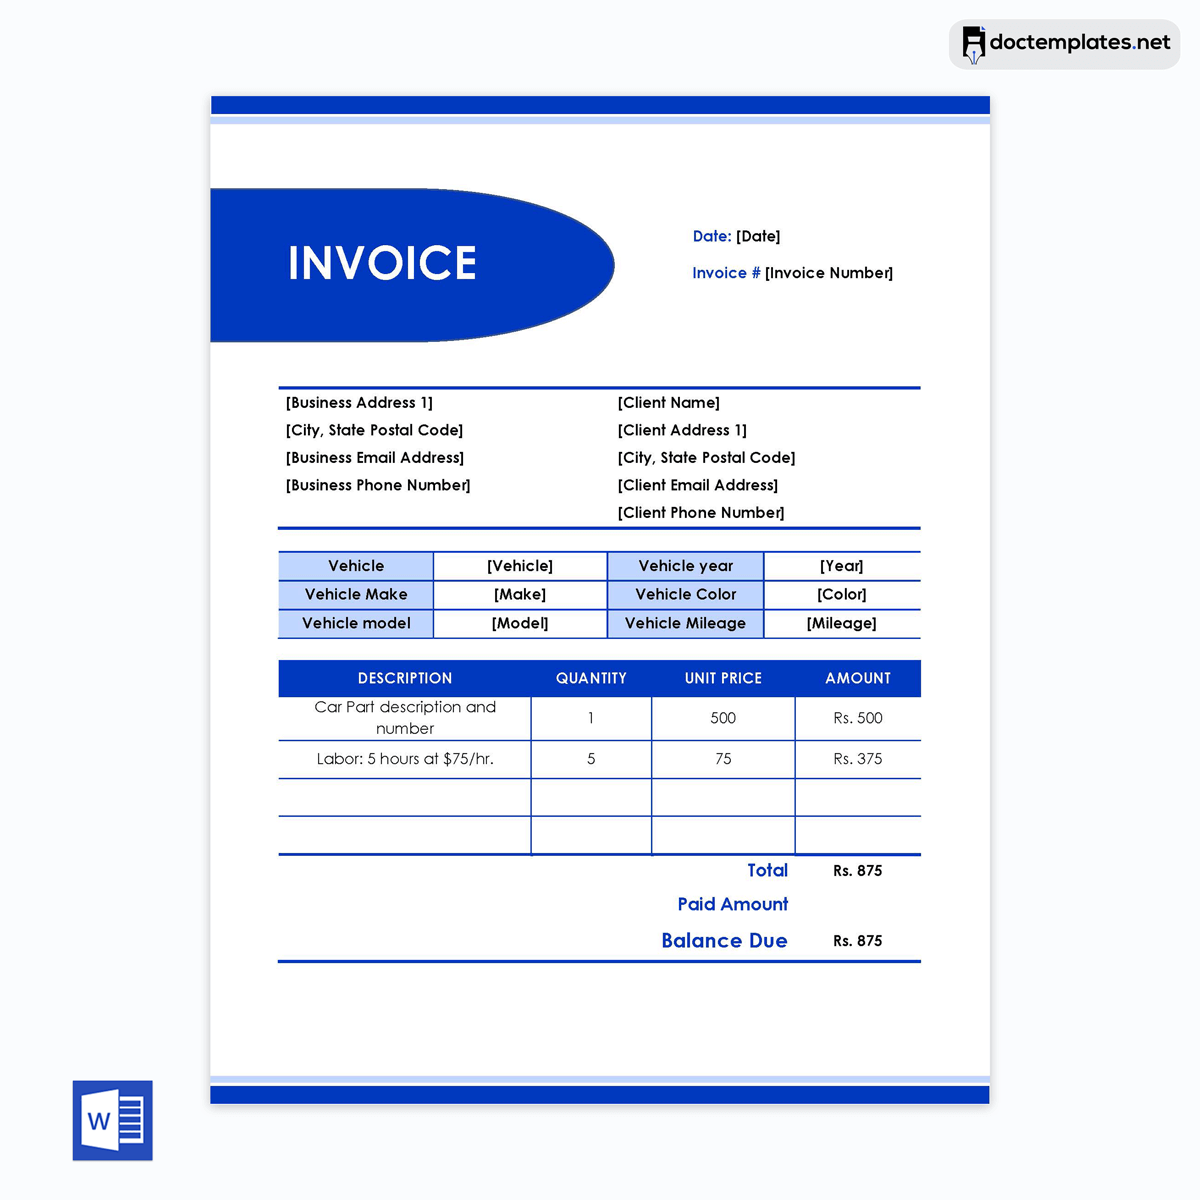
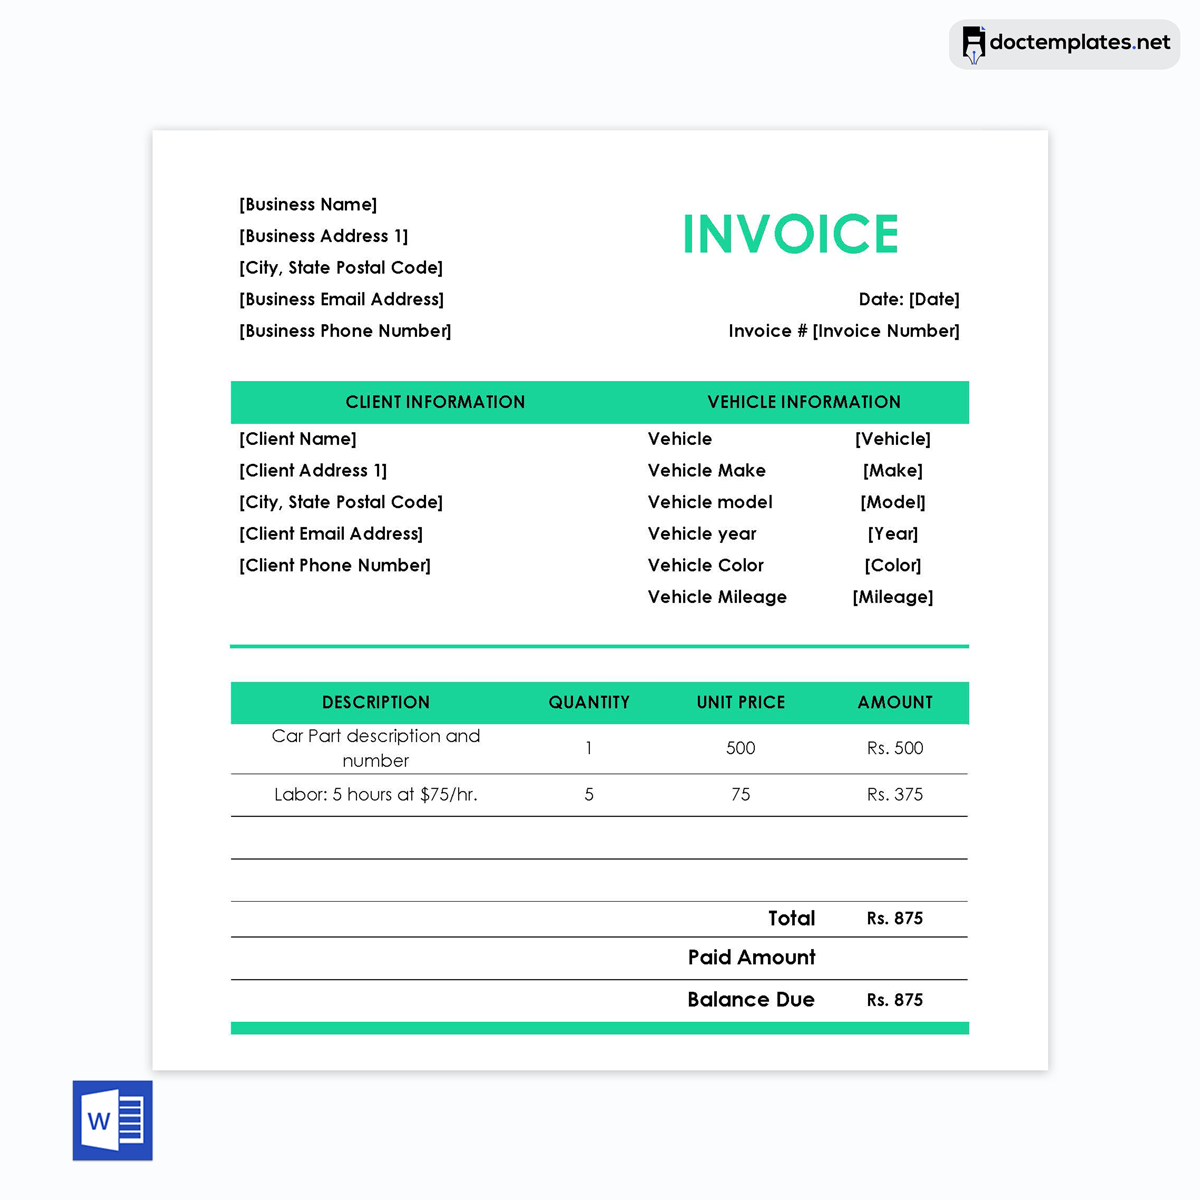
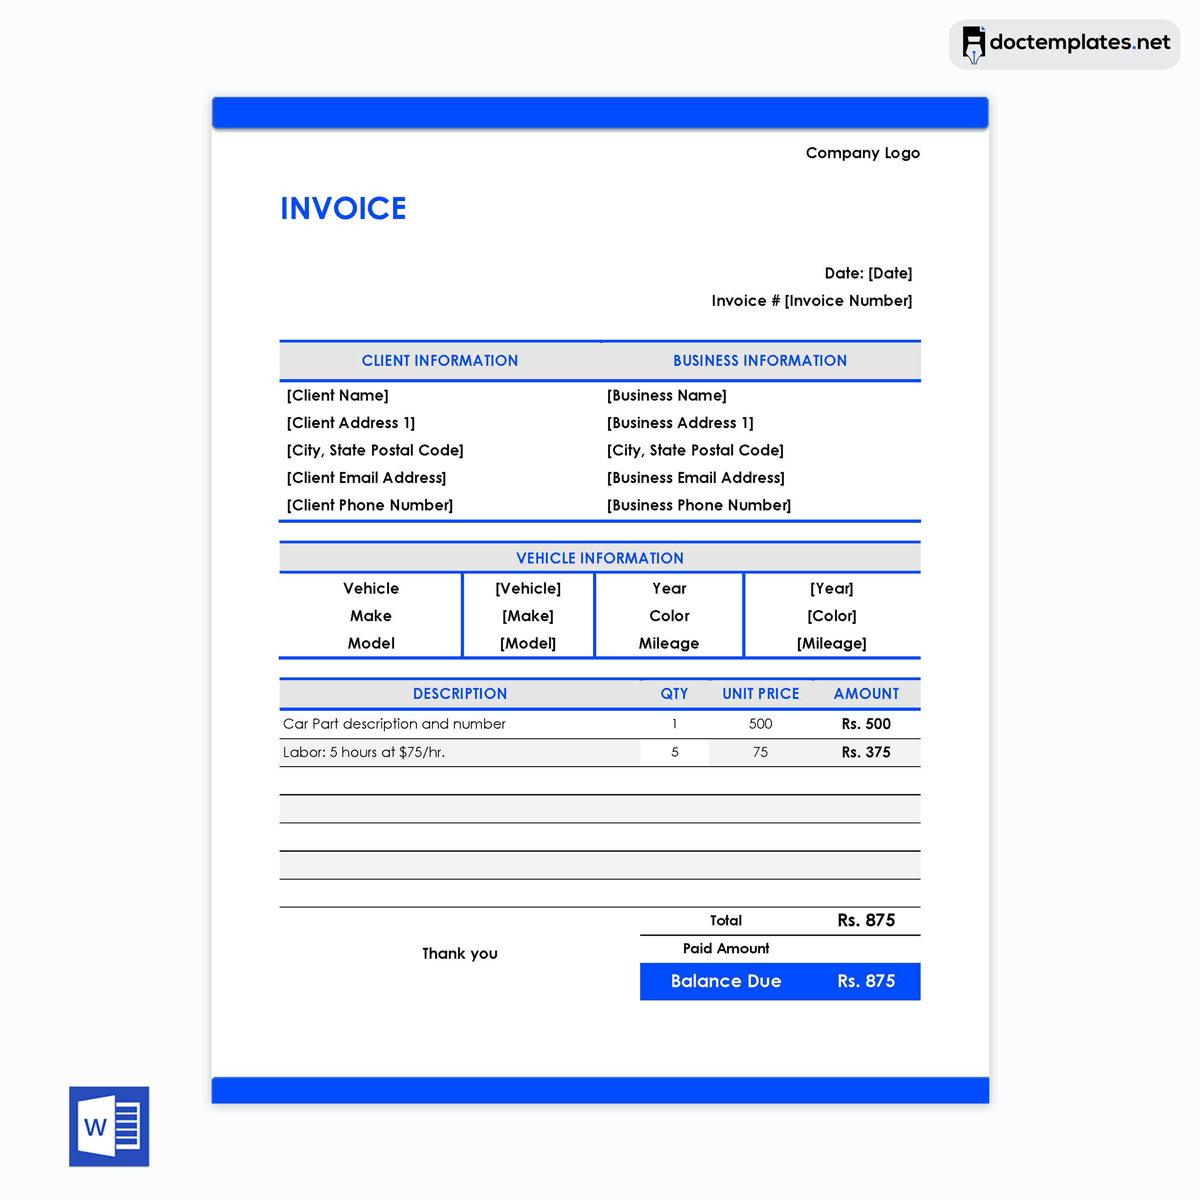
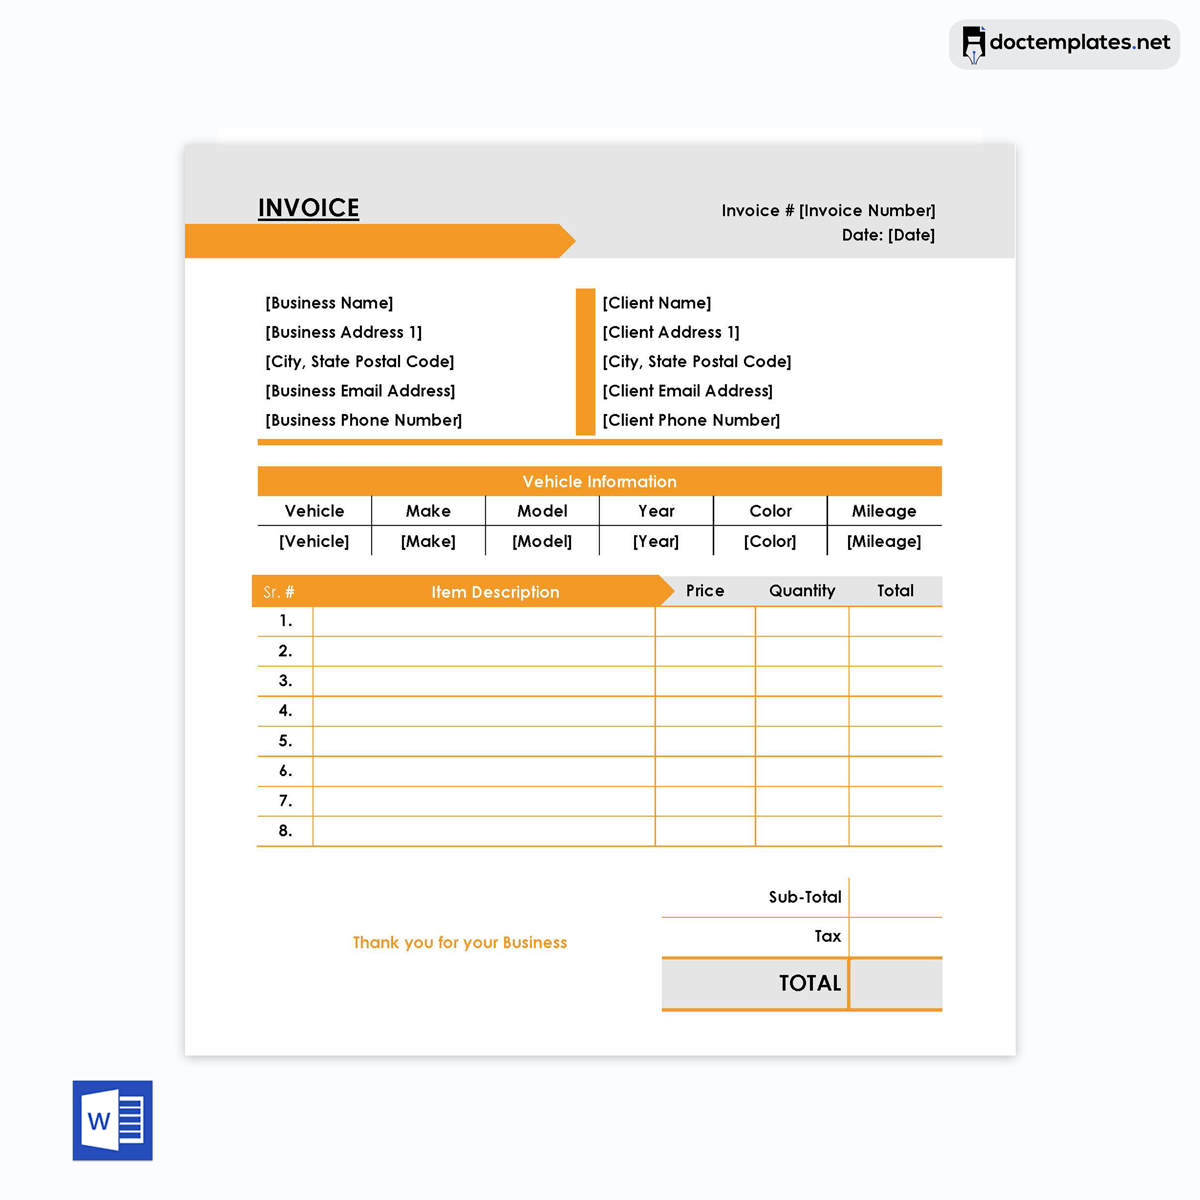
Following are the auto repair invoice templates that you can download for free:
Maximizing the Efficiency of Auto Repair Invoice: Why Templates Matter
Like any other business, the automotive industry relies on clients; as such, you should employ all possible means to attract and retain a good client base. An outstanding invoice can help you streamline business operations. It may be challenging to keep track of the various services provided, parts used, and labor hours and invoicing can take a lot of valuable time. That’s where a template is helpful; it can help streamline the invoicing process and save time and money for the business.
Businesses can use a template to ensure that their invoices are consistent and professional-looking, improving the company’s overall image. The templates can be customized to include the auto-repair business’s name, logo, and contact information, making it easier for customers to identify and contact the business. This can help build customer trust and make them more likely to return.
You can create your invoice template using common tools like Microsoft Word and Excel. However, free downloadable templates are readily available online for those who find the process difficult. They can be customized to fit the needs of the business, such as including fields for specific services or parts. They can also be reused for different services, making the invoicing process more efficient and time-saving for the business. Additionally, these templates often come with pre-formatted fields. They make bookkeeping easier by removing the need for manual calculations and reducing the risk of errors.

Creating an Auto Repair Invoice Template: Key Components and Best Practices
Auto repair shops require a steady flow of invoices; creating an efficient and professional-looking template is essential to the business process. Additionally, it is crucial to maintain a consistent format and layout for all invoices issued to customers. If you have decided to make a template for your auto-repair invoice, you can use MS Word or Excel.
This guide will be divided into two sections, a step-by-step guide on making a template using Word and a brief guide on making it in Excel.
Section 1: Using Word
Step 1: Start by opening MS Word and creating a new document. You can customize the format of your document on the ‘layout’ tab. Here, you can select your margins, whether you want the contents of your invoice to be more centered on the document or widely laid out. You can also change the spacing between your header and the beginning of the page.

Step 2: You should know the essential sections you must include. These sections determine whether your invoice is valid or not.
Here are the key components of an effective template:
- Title: Write your title, “Invoice.” Center-align your title by clicking the second option on the ‘paragraph’ section of your ‘home’ tab. The font of your title can be as big or as small as you want. It can be adjusted on the ‘Font’ section on your ‘home’ tab.
- Heading: The heading of the invoice should identify the business or shop that is issuing the invoice. This usually includes the shop’s name, address, and contact details.
- Invoice number: Each invoice should have a unique identification number. The invoice number is important for tracking purposes and should be included in the heading or at the top.
- Date: The date when the invoice is issued is an essential template component. It is usually placed next to the invoice number.
- Customer information: This invoice section contains customer details, including their name, address, and contact details.
- Vehicle information: This section provides details of the vehicle that has been serviced or repaired, including the make and model of the vehicle, registration number, and mileage.
- Description: This section describes the services or repairs, including labor charges and parts used.
- Itemized list: An itemized list of charges is essential to ensure the customer can see a detailed service breakdown.
- Total charges: The total charges section summarizes all the charges associated with the services or repairs and the tax charged.
- Payment terms: This section outlines the payment terms and methods accepted by the business or shop issuing the invoice.
- Notes: This section is optional but can provide additional information or instructions to the customer.
The name and address should be on the left-hand side of your document, and the date and invoice number should be on the right-hand side. To ensure they are well-aligned, you can align them to the left by pressing the Ctrl and L keys simultaneously and to the right by pressing the Ctrl and R keys simultaneously.
For a better format, you can make the text bold. Highlight the text and select the ‘B’ option on the ‘font’ tab.

Step 3: Insert a table by clicking on the ‘insert’ tab at the top left of your menu. Select the ‘table’ option and select the number of rows and columns you want for your table. A simple invoice should have at least four sections; description, quantity, unit cost, and total cost. Since you should have different columns, you can customize your table to suit your needs. In the example below, we need four columns for the description; as such, the table dimensions will be four columns and two rows.
Pro tip: Customize the template as needed by adjusting the formatting, adding your logo or branding elements, and making any other changes you prefer. You can save the document under a different name to preserve the original.

Step 4: You can add one additional cell at the bottom of the table for the total amount you will charge the client. To create a uniform table, you can merge the cells by highlighting the first three, right-clicking, and selecting the ‘merge cells’ option on the drop-down menu.

Step 5: After you insert the table, you can add your payment terms, details, and contact information. You can add the contact information as a footer for easier formatting.

Step 6: Save the document by clicking the “File” tab and selecting “Save As.” Choose a name for the document and select “Word Template” as the file type. This will ensure you can use the document multiple times without accidentally overwriting the original.
Section 2: Using Excel
Step 1: Open a new Excel worksheet by typing the word ‘Excel’ on the search bar and selecting a blank workbook.

First, you must add the title and company logo to the document. To add the logo, highlight and merge cells A3 to C3 and add it as a picture or insert. This can be done by selecting the ‘insert’ tab on your menu and selecting the ‘picture’ option. To add the title, highlight cells E3 to I3 and merge them; you can then type out your preferred title, which in this case is ‘Auto Repair Invoice.’


Step 2: Indicate the name, address, telephone, and email address on cells A5, A6, A7, and A8, respectively. Because the above fields need to be filled, you should leave blanks next to each section. For uniformity, highlight cells C5 to C8 and F5 to F8, where you will add the required information.

The client’s name, address, and contact information should be indicated after your company information. You can select any placement but place the information beside the company section for uniformity. Indicate the date, voice, customer identification, and the dates on cells I5 to I9, respectively. The blanks can be filled on the cells adjacent to each field. As such, highlight cells K5, K9, N5, and N9, where you can add the details.

You can then add the billing information below the company section. First, select cells A11 to C11, merge the cells, and add the title ‘bill to.’ Add the customer name, street address, city state, zip code, and telephone number on cells A13 to A15, respectively.

Step 3: After adding billing information, you can create tables for each section, service, and description, as well as the total. The first column should be for the description of services. To create the header, select cells A17 to E17, and use the ‘merge and center’ option. Since the quantity is often expressed numerically, two cells are sufficient; you can highlight cells F17 and G17, merge and center them.
Finally, for the ‘amount’ section, you can merge cells A18, A24, and I18 to I24 to create the rest of the table. To create borders around the table, select the border option on the ‘font’ option of your ‘home’ tab.

Step 4: You can now create a section for the subtotal, tax rate, tax due, and grand total charge. This section should be placed right below the quantity column. Indicate each of the above fields in respective cells beginning with the subtotal in F25, G25 to the tax due section in F27, G27.
For the total, highlight cells F28, F29 to G28, and G29 merge and center them. Write the word ‘total’ in bold. Highlight the corresponding cells H25, H29, and I25, I29, where you will indicate the appropriate values.

Step 5: You can then insert a section for payment terms and payment information. In this section, you can select your desired value. First, highlight cells A30 to G30, merge and center, then indicate the title ‘Terms of payment and other comments’. Then highlight cells A31, A42 to G31, and G42, where you will indicate the comments.
Pro tip: The tables may be formatted by changing the colors and borders. To change the color, simply highlight the table and select the ‘fill color’ option. From the drop-down menu, you can select a color of your liking. You can adjust the borders by selecting the ‘borders’ option on the font tab.

Step 6: Once you have finished entering the details on your sheet, you can format the cells, rows, and columns in different fonts and colors by selecting options on the ‘home’ tab at the top left of your menu. You can then save the Excel sheet as a template.

We have provided free pre-built templates that you can use if you find it challenging to create your own. They can be customized for your use; you can fill in your details and print them.
Bottom Line
Billing is one of the most important business processes in the auto repair industry. To ensure you have an efficient billing system, you should use invoices. They help you record the services you have provided to your clients and justify the cost. Since the invoice contains a breakdown of the services, you should include important information such as the contact details of each party, the cost of each item, the amount of tax charged for each item or service, and the applicable tax rate.
Beyond record-keeping, these invoices can help you run your business without difficulty, as you can save time by simply filling a pre-built template instead of preparing one from scratch. You should download one and use the same format for all your clients.
