An itemized receipt is a document merchants give their clients listing the transaction details.
The receipt should provide details such as the quantity of the item, its price, and the total. A standard itemized receipt should also provide details of the taxes and other fees relevant to the transaction.
An everyday receipt has similar information, such as the total amount, date of issue, parties’ names, receipt number, time of purchase, and payment method. However, the itemized receipt contains additional information, including a breakdown of the items sold and their prices, taxes, and other additional costs.
Itemized Receipt Templates
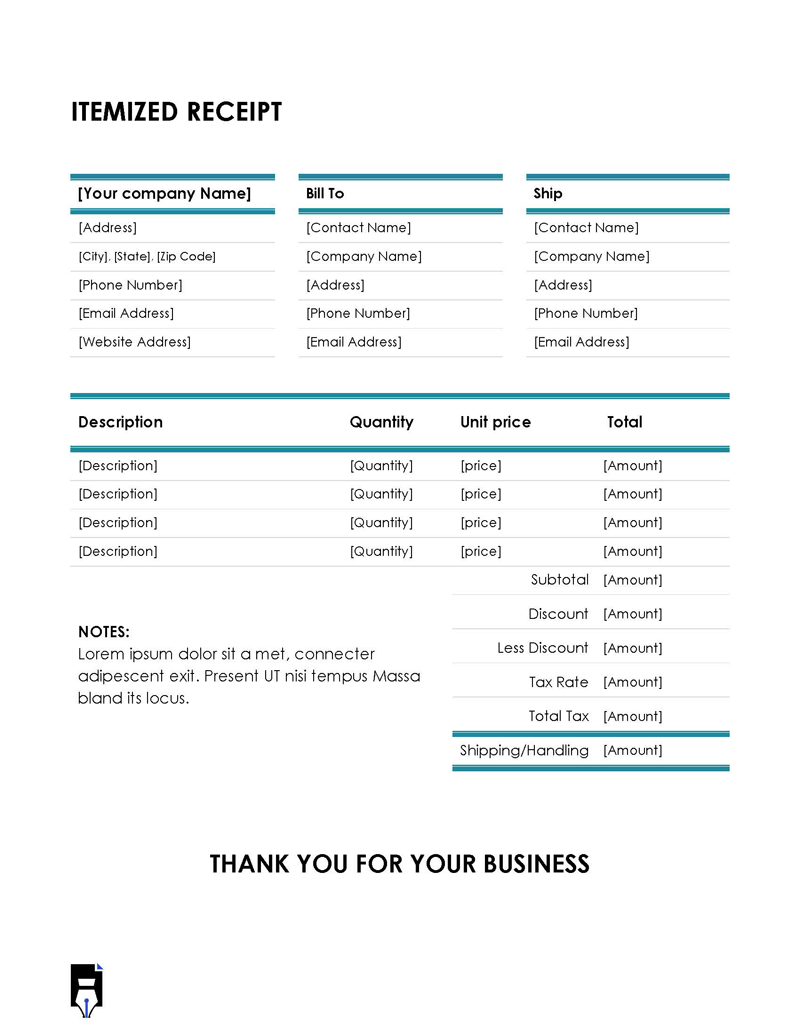
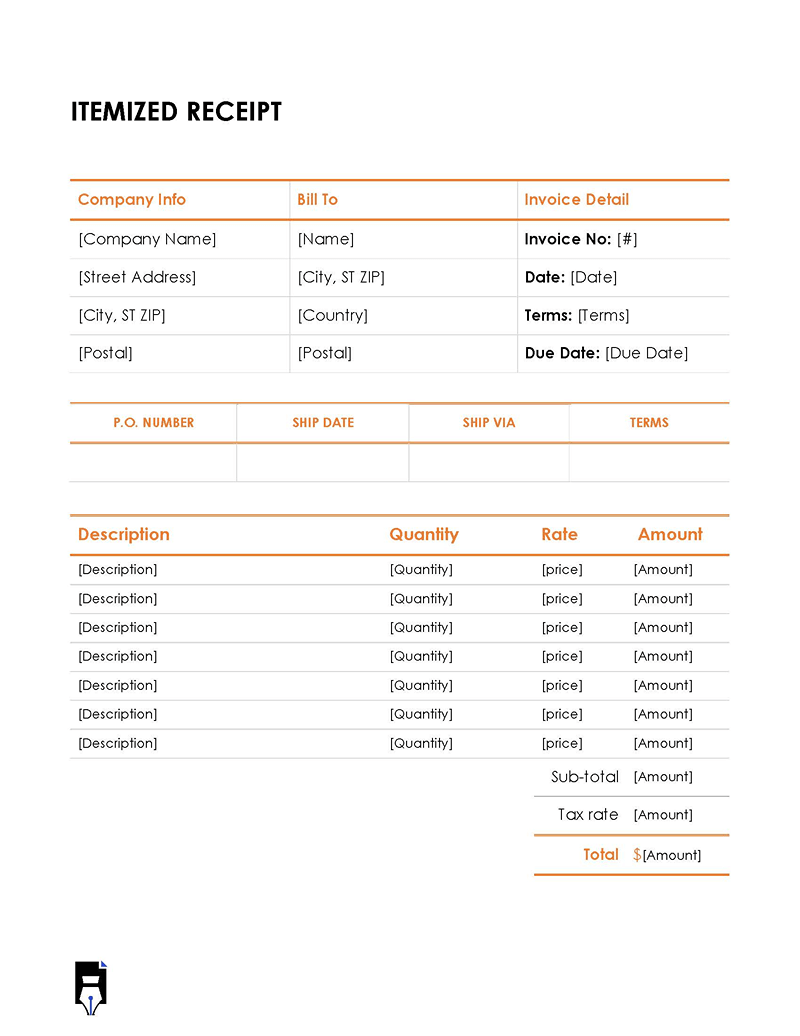
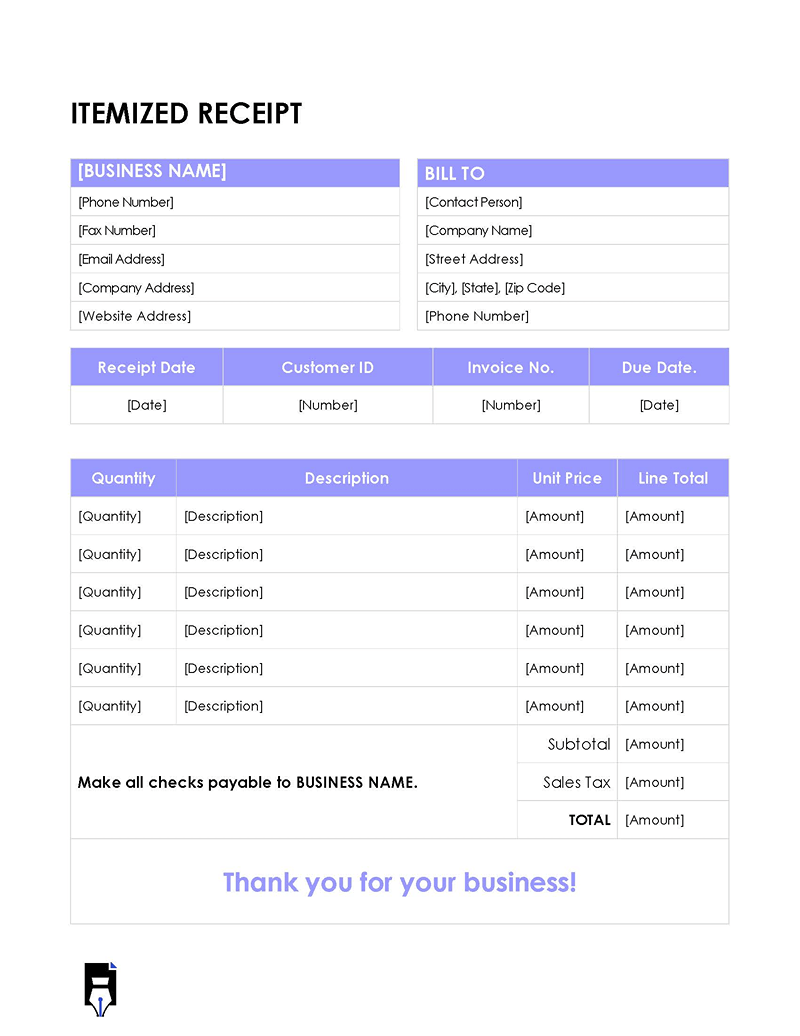
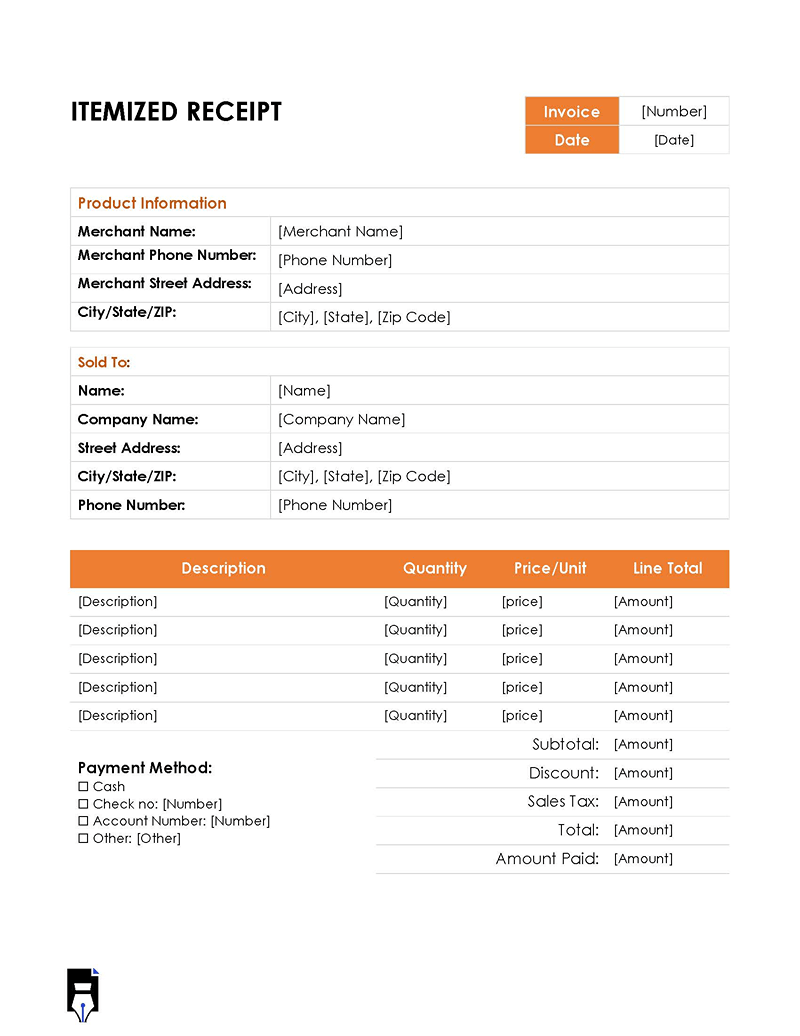
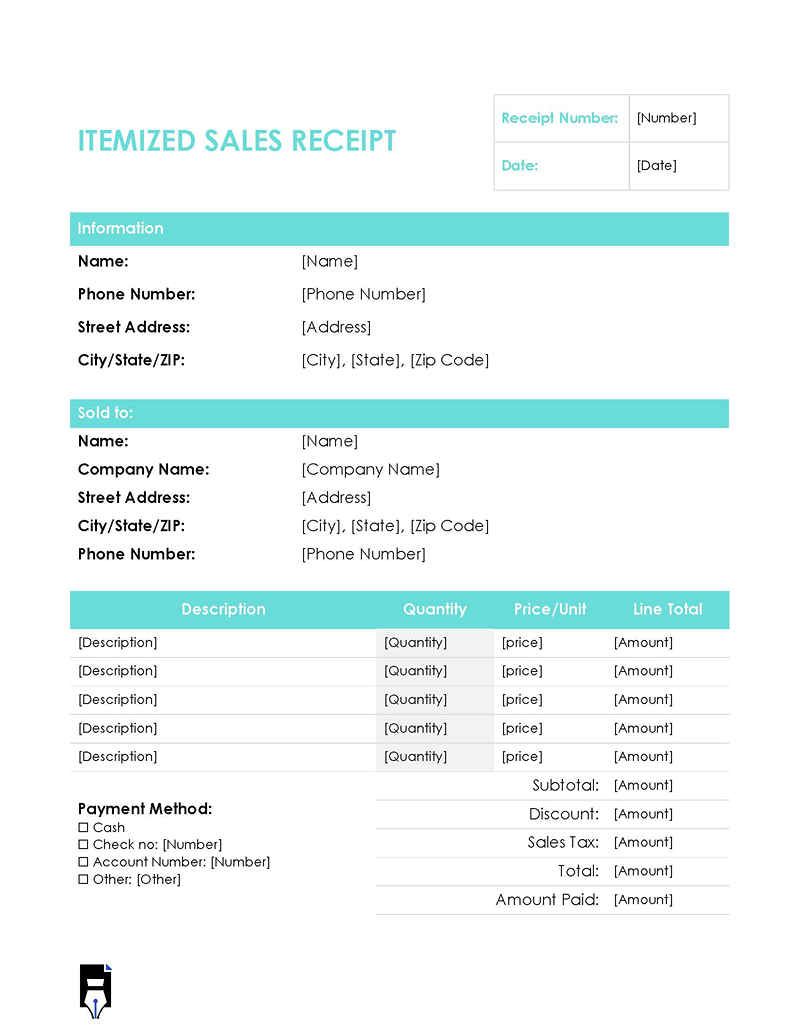
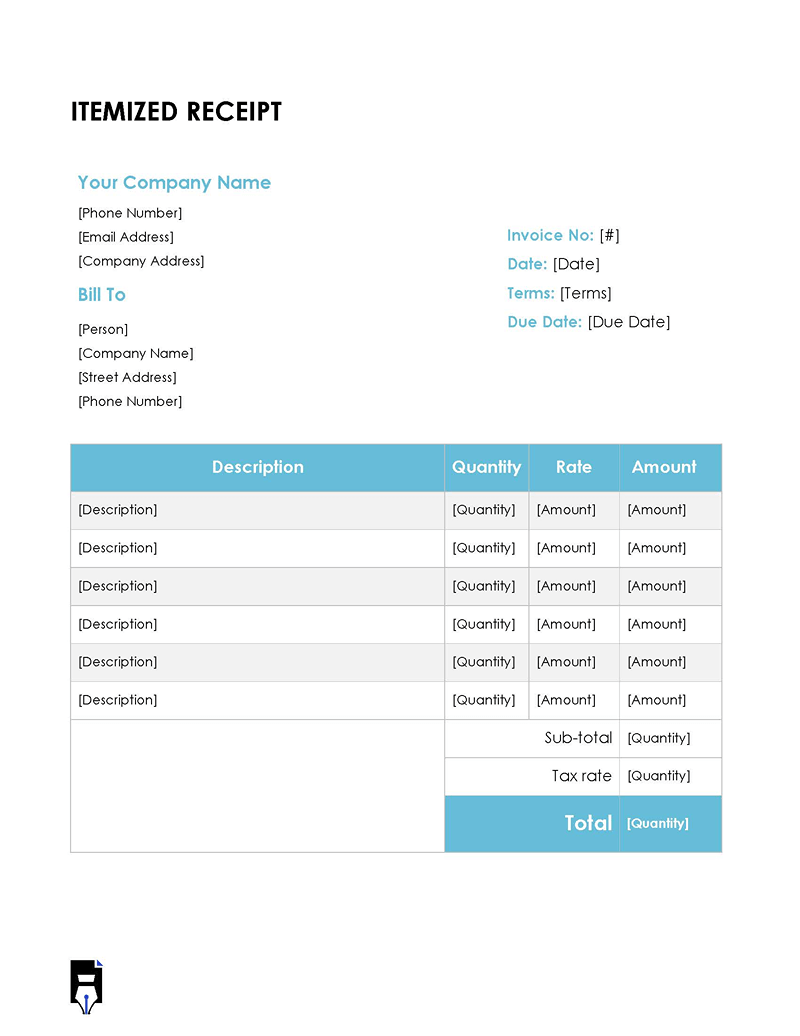
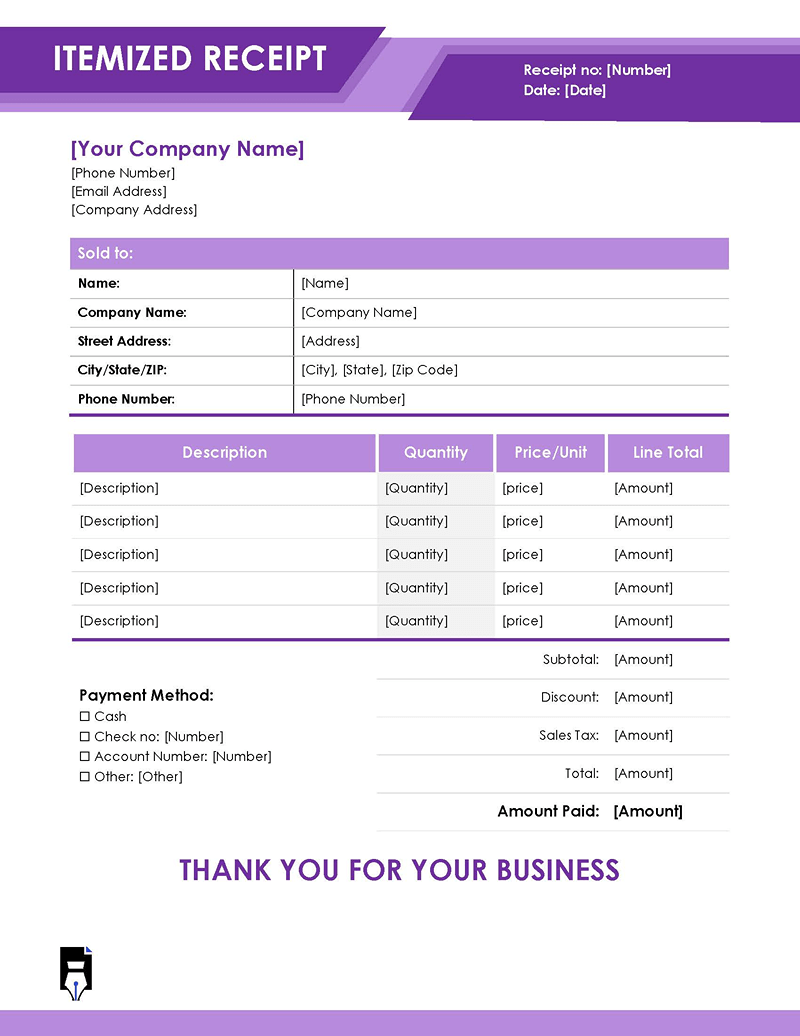
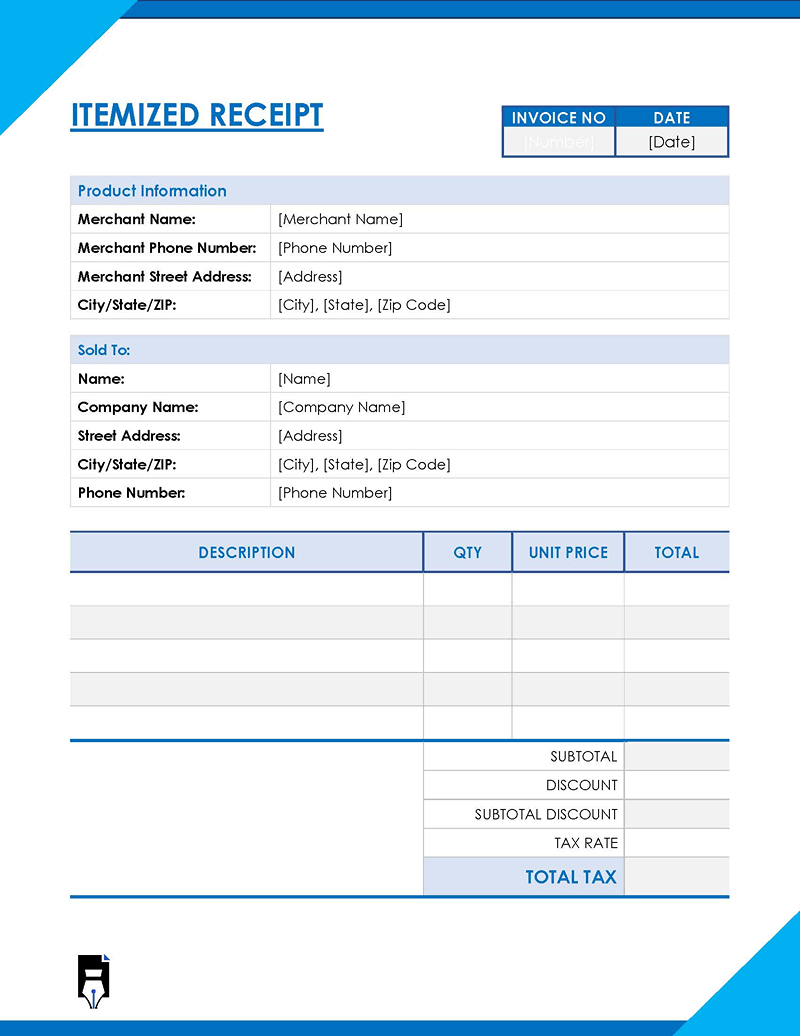
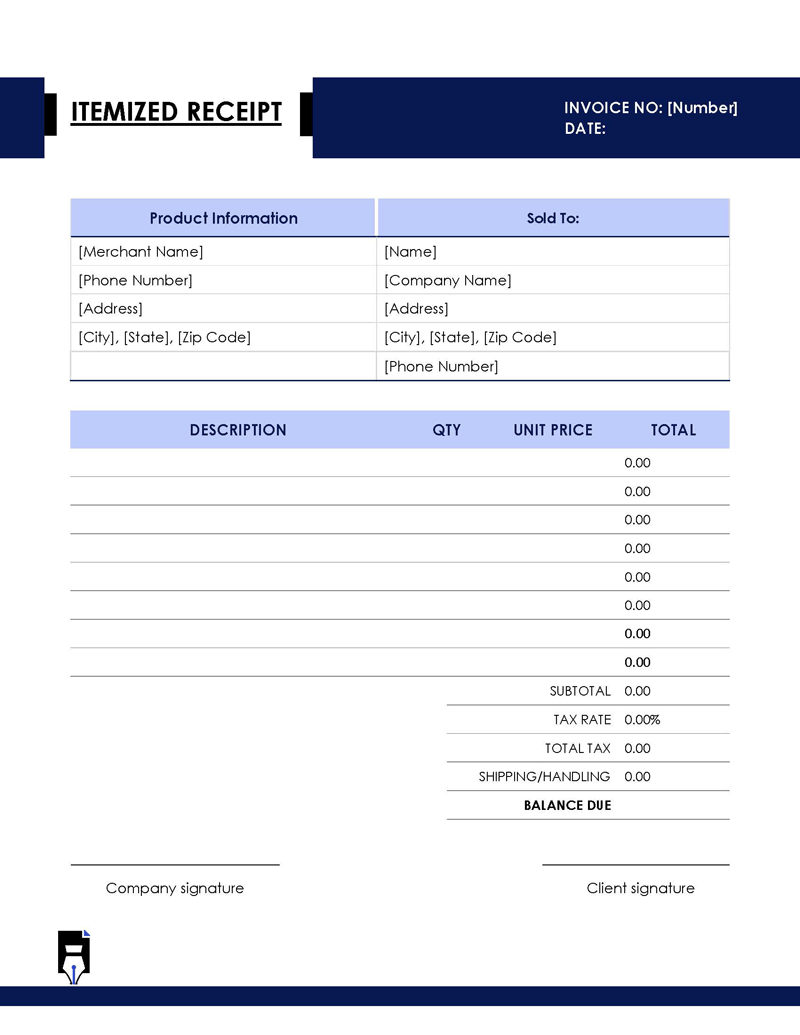
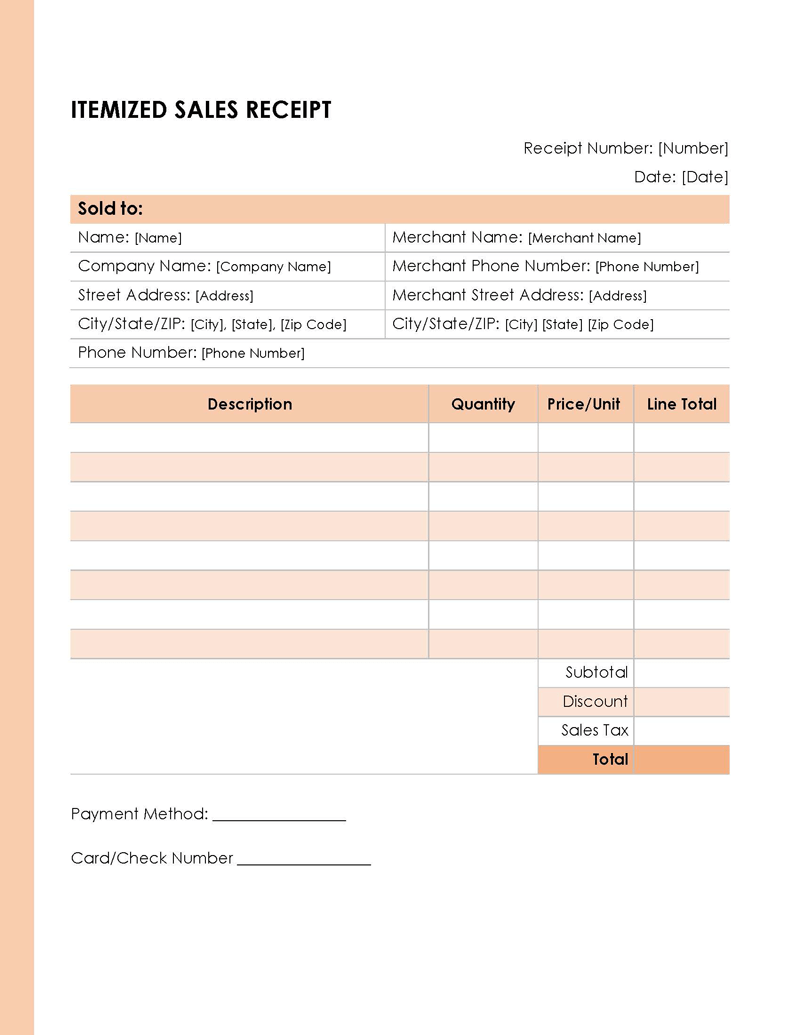
Given below are itemized receipt templates:
This article discusses the importance of itemized receipts, i.e., why they are essential in accounting, especially when reconciling accounts. It also discusses the components of a template and certain significant considerations when creating it.
Why Are Itemized Receipts Necessary in Accounting?
Itemized receipts are one of the essential documents in accounting and invoicing because they provide correct information on each item the merchant has sold or services they have provided. They are issued at the end of a transaction because they are supposed to give a complete and precise record of products or services. The accounting part of your business is essential for recording your financial transactions.
With a proper accounting system, you can quickly analyze and share financial information within your business and external agencies like the federal government for tax collection. It is crucial to have proper accounting records, not just for documentation, but accurate records to help the merchant organize their business. With good records, merchants can easily access information and understand what payments they need to bill their customers for.
Since they provide itemized information, receipts are helpful for merchants and clients in the products and services industries. For example, they can be used by healthcare workers, photographers, handypersons, housekeepers, retailers, landscapers, hotel owners, and consultants.
They allow merchants to list every product they have provided and the amount billed for it. On the merchant’s part, the receipt provides a detailed record and request for payment. On the client’s part, the receipt helps them justify the total amount they are supposed to pay the merchant. On both ends, the receipt is a record of the transaction.
With such information, you can reconcile your financial books at the end of each day. In addition, it helps you organize your business as you can easily access the information you need and update your books to represent the current state of your business. You can identify the products that sell the most and least from these receipts. This information lets you decide on the products to store more or less.
Besides internal organization, these receipts are a sign of professionalism. When you present an itemized receipt to your customer, they understand how the total charges occur. It reflects that you have an organized system of conducting your transactions and a transaction record. The receipt acts as proof of the provision of goods and services. It also lets you remind customers of an individual charge they might have forgotten. Professionalism and transparency make your customers feel confident in your business, can give positive reviews, and refer you to their friends and family.
They can also be used where the employee is seeking reimbursement. The employer can use the receipts to identify personal purchases that should not be included in an employee’s reimbursement. As a result, they can deter employee fraud. When an employee submits a request for reimbursement with an out-of-policy purchase, for example, entertainment, you can reimburse the amount without the cost of entertainment.
A template is a time-saving tool that can help you prepare an itemized receipt in a few minutes. It guides you on what information to include and how to structure its different sections. This aspect greatly benefits those merchants who prepare multiple receipts in a day.
What to Include in an Itemized Receipt Template
Now that you completely understand the importance of a template, knowing what to include when creating one is crucial. Since this itemized receipt contains more details than an ordinary one, you must ensure you include all the necessary information, as discussed below:
Receipt number
Receipt numbers are unique to every receipt and transaction. They are generated once a transaction is complete and the client must pay. Such a number should be added to distinguish each itemized receipt from another.
Date
The receipt is often issued on the date the items were purchased. Including the date section in the template is crucial as it is part of the transaction’s identifiers. The date can be used when tracking transactions, especially to follow up on late payments. They are often written on the top right side of the itemized receipt.
Merchant’s information
Since the itemized receipt is proof of a transaction between you and your client, you must provide your name, address, and contact information. Your client can use the information to verify your identity and contact you if they need clarification on any of the items listed on the receipt.
Client’s information
There are two parties to the transaction, yourself and the client. You should indicate your client as the other party to the transaction. Therefore, you must identify the client’s particulars, especially their name, address, and contact information. You can use the contact information to deliver the itemized receipt to the client or to follow up on the payment.
Items/products
Describing the billed items in an itemized receipt is one of the essential parts of any template. You must include the quantity, price, and total of each item/product. Where the receipt is for goods sold to your client, you should specify the number of units of each item and the price per unit. Your item description should be as accurate as possible to avoid confusion on your client’s end.
Sales tax and GST
The goods and services tax (abbreviated as GST) is a consumption tax levied on sold items. The GST is typically a fixed percentage rate charged to the product’s price. Sales tax is applicable on goods and services purchased by the buyer at a particular rate depending on the location of the sale. Where the laws of your state require you to file taxes, you should specify them as part of the total payment billed to the customer.
Discount
If you have offered your client a discount, you should write the amount discounted after listing your sales tax on the itemized receipt. This method is preferred because the discount will be subtracted from the total amount the client owes.
Subtotal and amount paid
The subtotal is the sum of the prices of all the items without adding the sales tax. The sum of the subtotal and the sales tax, minus the discounted amount, gives you the total charge billed to the client. This information must be indicated in the itemized receipt and the amount paid by the client on the appropriate line below the total on the template.
Footer
The footer section provides information on the total amount to be paid, the payment terms, and the instructions your client is supposed to follow. You can include any extra information regarding the transaction in this section of the template.
Payment method and terms
The payment terms are the applicable conditions and guidelines you and your client agreed on regarding how the money owed should be paid. You can identify the date or period the client should pay in this section of the template.
Card/check number
Depending on the method of payment your client used, you should indicate the card or check number on the appropriate blank line. Then, you can specify the payment method used by crossing the alternative method on the template. For example, if the customer paid via check, you should cancel the card option. This information increases the accuracy of your accounting records as it is clear which payment methods your clients often use.
Special note
While it is not mandatory, you could thank your customer for purchasing your goods and services. This section of the template makes your itemized receipt more personalized. You can also give your customer a discount for their next purchase as an incentive to buy from you again.
Using a Template to Make an Itemized Receipt in Word
MS Word has thousands of pre-built templates that you can use to create itemized receipts. They have been professionally designed to suit the accounting needs of businesses in general. However, Microsoft has made them easy to customize to suit your specific needs.
You can follow the steps below for making and utilizing it in MS Word:
Step 1
Open MS Word. Navigate to the “File” section and select “New,” and different options for Word documents will appear.
Step 2
Next, go to the templates search button, search for “ Itemized Receipt,” and select the one that will serve your business appropriately. You can review several documents before settling on a specific one. Selecting it allows you to go through its components. After identifying a suitable one, click “Create.”
Step 3
The template will have multiple components that can be included in an itemized receipt. You can modify it by removing or adding necessary sections in your receipts. It will have instructions on where to include the information. Some essential items that must appear in it include the receipt number, date, merchant and client’s details, line items, sales tax, total charges, footer, payment method, and terms.
Step 4
Lastly, preview the document for printing and saving. Once your template has been personalized to your satisfaction, go to “File” and then select “Print.” Your document should fit on one page while displaying every detail clearly. Ensure the document does not exceed the print area or the margins are correctly set. Once ascertained that it is well formatted for printing, you can save the document for use in the future. Go to “File” and select the preferred storage folder.
How to Appropriately Format an Itemized Receipt Template
Formatting is key in all business documents. This is to ensure accurate documentation of company records, especially accounting paperwork. These documents can have severe financial and legal implications if improperly recorded.
Below are several formatting guidelines to help you with preparing itemized receipts:
- Margins – The receipt should have 0.5” margins on all sides of the document. This leaves enough space to accommodate the multiple components on a single page.
- Spacing – You can use single spacing for it. However, adjustments may have to be made to suit the different types of information to ensure the receipt is presentable and legible.
- Appropriate size – Use a “Letter” page size when creating it.
- Font style – Only formal fonts like Arial and Times New Roman should be used. However, you can use presentable fonts to align with your brand in certain sections, like the business name.
- Font size – You can use different font sizes in different sections of the receipt. However, the font size should be easy to read and must produce a presentable receipt.
Important Considerations
When thinking of itemizing your receipts, you should consider including each item. Doing this task manually can be exhausting, especially when preparing multiple receipts. Furthermore, you may make mistakes in the details of the transactions or details of items as you enter them onto your receipt template.
You can reduce your task by considering the following methods:
Auto-itemization
Auto-itemization is an alternative to manually entering details on a receipt. In this method, you can upload the receipt on the auto-itemization program, automatically categorizing the receipt items into the appropriate lines and sections. Then, the program assigns each item to an automatically pre-programmed category for every transaction.
This method can help you save time by reducing your time on each receipt. Further, you can analyze each item on the receipt and edit, view, approve, and reject the items as your business policy allows. Auto-itemization will benefit you if you have a financial team with different departments. It will allow different team members to perform their tasks quickly, thereby improving productivity.
Use a pre-built template
Alternatively, you can download a pre-built template to fill in the details of your receipts. Unlike auto-itemized programs, they are less costly because you can download them for free. You do not have to hire a graphic designer to prepare it for you, as they are easily accessible online. You can edit it and add or remove the details you need for every receipt you prepare. Besides being editable, they are customizable; you can adjust colors, lines, and sections. With a proper template, you can save time preparing your receipt from scratch whenever needed.
Bottom Line
A successful business has to be organized. Your transactions must be appropriately recorded to make it easier to close your books at the end of the month. Daily reconciliation of accounts is also crucial. A properly written itemized receipt is one of the easiest ways of recording information. Issuing it lets your customer understand the goods or services they got from you in detail. Your receipt is also a sign of professionalism. In addition, you can use it as proof of a transaction if your customer challenges some of the items you have included.
Your receipt should include all the proper details. You can begin by writing the receipt number and date of the transaction. You should also identify the parties to the transaction as they are the ones that are liable for payment. Further, ensure you indicate the correct prices for each item. Any error in your receipt could make you appear unprofessional to your clients and result in an imbalance in your accounting books. If you find the manual preparation of receipts challenging, you may use a template or an auto-itemization program to prepare itemized receipts.
